
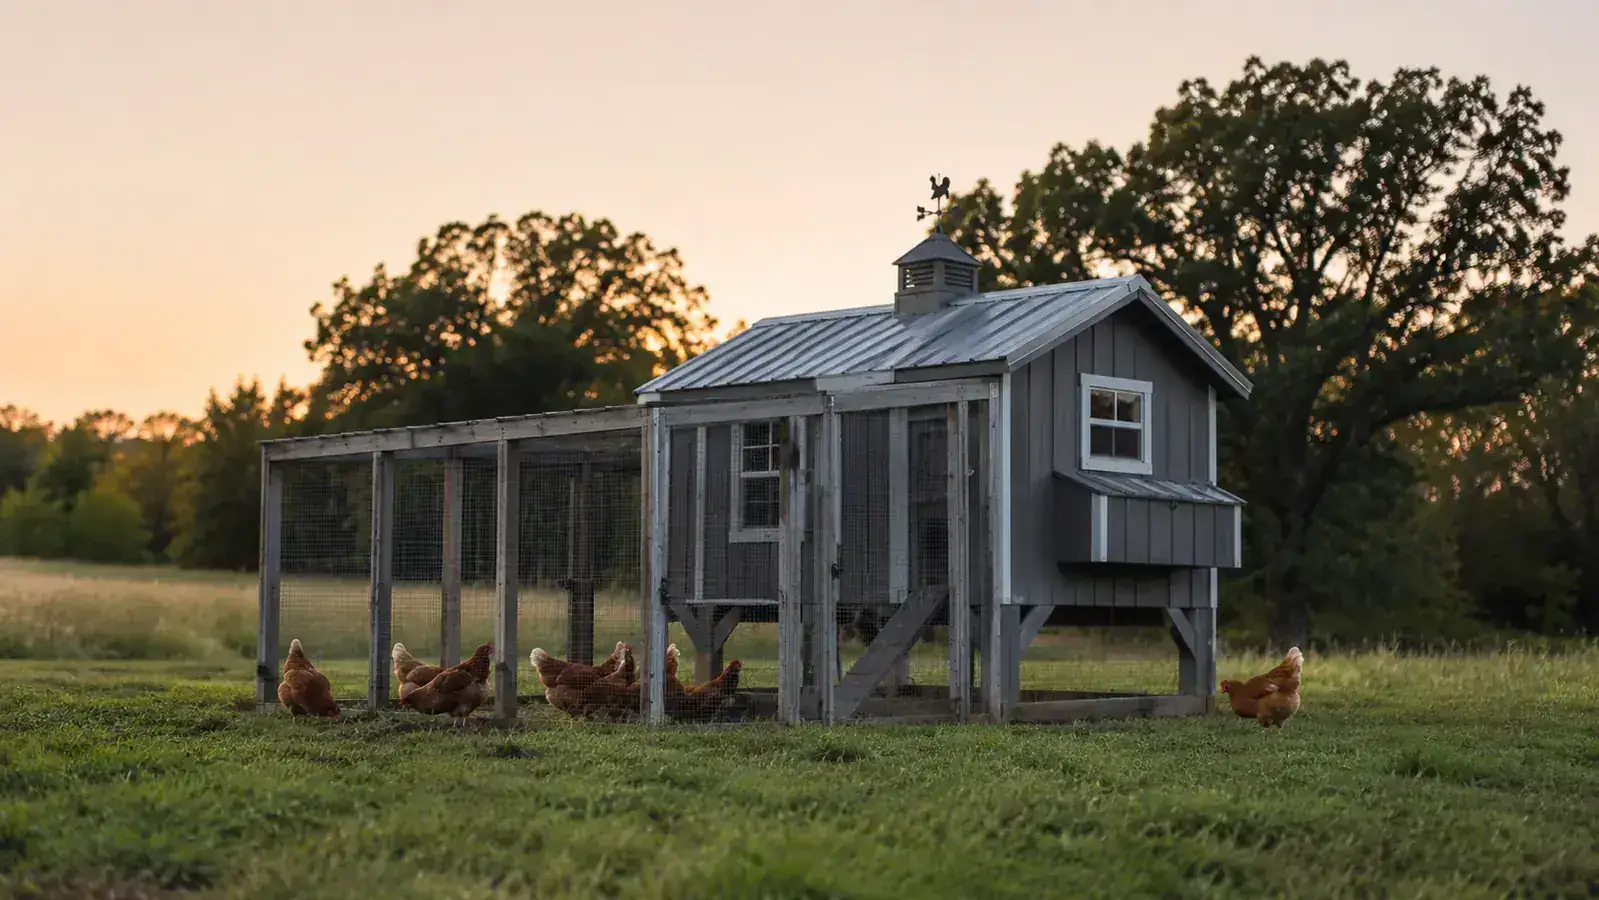
You have read the five-star reviews. Every one of them shows the same grey wooden coop sitting pretty on a sunny lawn, and they all make assembly sound like a lazy Saturday project. I want to tell you the part those reviews skim past, because I assembled this exact Aivituvin coop for 4 to 6 birds myself, in the rain, in a Missouri October, and the honest truth is that the box is heavier, the instructions are thinner, and a few corners need your help before this thing earns its keep.
To be clear up front: I like this coop, and my hens have been happy in it. But happy and perfect are two different things, and if I am going to point you at it, I owe you the difference. This is the review I wish someone had handed me before I dragged two hundred pounds of plywood off the porch.
The Quick Verdict
A solid, attractive wooden coop for a small flock that needs a few hours of reinforcement at assembly before it is truly predator-tight.
Amazon Check Today's Price →A solid wooden coop, once you spend one afternoon making it right
It is not the coop that will lock itself out of the box. But with the reinforcement I describe below, the Aivituvin is a genuinely good home for 4 to 6 birds. See the current price for yourself.
Amazon Check Today's Price on Amazon →How I've Used It
I run about a dozen hens total, split between two coops on the property. The Aivituvin houses four of my quieter Rhode Island Reds, and it has now been through a full wet season, a Missouri winter with single-digit nights, and spring storms. It sits on the high side of the pasture so water drains away from it. That siting matters more than any review can tell you, because wet ground under a wooden coop is what rots the feet and invites the rats. I learned that the hard way with my first coop years ago.
Day to day it does its job. The hens put themselves to bed in it, they lay in the nesting boxes on the outside of the wall, and the tray slides out for cleaning. That run underneath gives them a spot off the ground during the day and keeps them out of the mud. I open the panel in the morning and shut it at night, and in a year I have not had a single bird lost to anything, which is the number that actually matters to me.
But I put roughly three hours of work into it the weekend after I set it up, before it was ever in service. That work is the honest difference between a coop that lasts and a coop that rattles apart in a year, and it is the part the listing photos never show you. I want to walk you through exactly what I did, so you can decide before you buy whether that is a trade you want to make.
Getting It Home and Setting Up
First, the reality of the box. This is not a lightweight tractor coop you can sling under your arm and carry to the yard. It is a heavy, bulky crate, and it will not fit comfortably in a compact car. It arrived flat and nested, which is good for shipping, but it meant the whole thing had to be laid out and moved piece by piece rather than carried as one unit. Do yourself a favor and unpack it near where you plan to build, because you will be carrying plywood panels further than you expect.
The instructions that ship with it are small black-and-white line drawings, and a couple of them are easy to read the wrong way the first time. Lay every piece out and count the hardware against the parts list before you start. I did not, I found three extra screws and one short one, and I spent an unhappy hour wondering where I had gone wrong. I had not. The count was just off from the box. Read the whole booklet once before you pick up a driver.
Assembly: Clear an Afternoon, and Read the Whole Book First
The panels fit together reasonably well, which is more than I can say for some cheap wooden coops. The pieces are beveled and the screw holes line up on the main walls. Where it gets fiddly is the roof, which is one large panel that wants to slide off the walls before you get all the screws in. That is a two-person job. Do not try to wrestle it alone, or you will crack a corner and spend the rest of the season telling yourself it is fine. It is not fine, and a cracked roof joint is exactly where a winter drip finds its way in.
My honest advice is to dry-fit the whole thing loose first, then tighten everything a second time. The holes are not always perfectly centered, and a panel that looks square loose will pinch and go crooked under full screw tension. Two passes, front to back, will save you more cussing than the instruction sheet ever will. Take your time on the piece that forms the floor tray guide, because if that runs crooked, the sliding tray binds and every cleaning day becomes a fight with a stuck tray.
The Corners the Reviews Never Mention
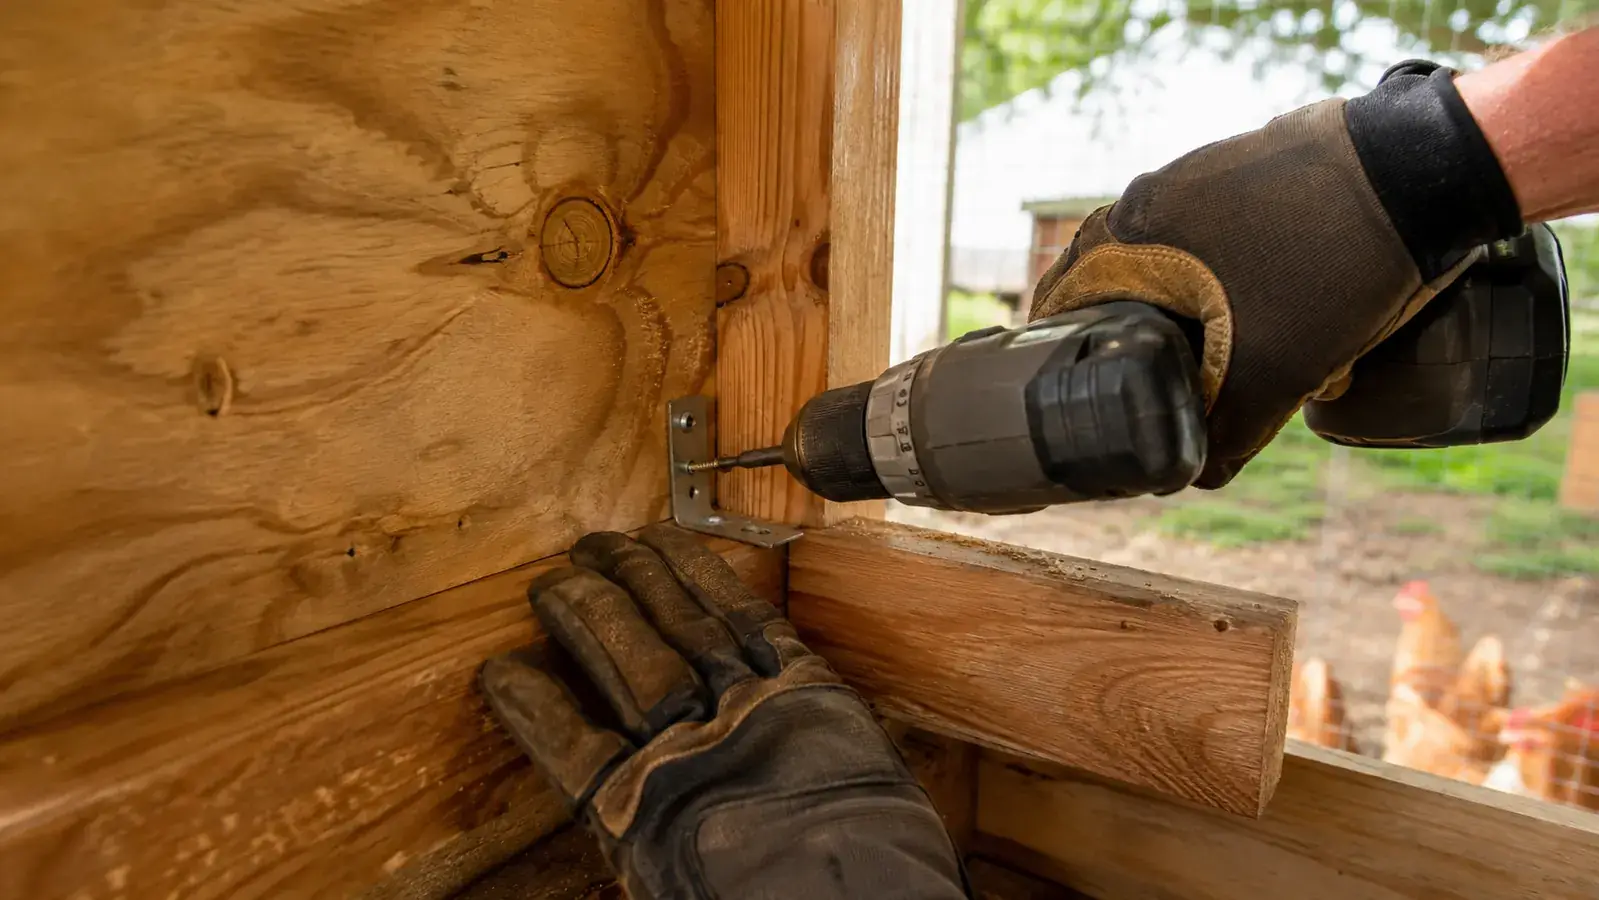
Here is the thing I genuinely think you need to know before you buy. The Aivituvin is built from plywood panels, and those panels are screwed along their edges into the framing. At the inside corners, the joints are not reenforced past the screws themselves. That is fine when the coop is sitting still on a flat lawn in a photo shoot. It is less fine after a season of wind, of a heavy hen bouncing down off the roost, and of me leaning my weight against a panel to clean behind it.
I fixed mine in one inexpensive afternoon. I bought a small pack of galvanized corner brackets and a box of short deck screws, and I screwed a bracket into every inside corner, top and bottom, plus one on the hinge side of the door panel where the weight of regular opening works the joint. It took maybe an hour and cost a few dollars. If I had skipped it, I am fairly sure I would be writing you from a windy spring about a coop that went loose at the corners and a door that no longer sat flush enough to keep the weather out.
That same afternoon I added a bead of exterior caulk along the seams where the walls meet the roof and checked every staple line. Those small, boring jobs are the whole difference between a coop that keeps its shape and one that works loose. It is the reason a neighbor and I each bought the same coop the same month and got two different results: mine is square and tight a year later, and his rattles at the corners when a storm kicks up.
Do not skip the three hours of reinforcement. That afternoon of corner brackets is the difference between a coop that rattles apart and one that carries a flock through the seasons.
Predator Protection: Good Enough to Make Better
The wire that comes on the run is better than the hardware cloth I have seen on cheaper coops, and the mesh is small enough that a weasel is not going to squirm through easily. That is a real selling point, because weasels and rats get through surprisingly small gaps, and this coop closes most of them out of the box. That said, I am a farm person, and I trust nothing a manufacturer calls predator-proof without testing it myself. Upgrade the wire to 1/2 inch hardware cloth if raccoons and weasels are a serious problem where you live, the way they are here in Missouri.
The bigger weak point is the door. The latch that ships with it is serviceable, but it is not a lock a determined raccoon cannot work on. Raccoons are patient and smart, and once they figure out your schedule they will work a latch for an hour if they think there is a meal inside. I replaced mine with a simple rotating hasp and a carabiner after my second week, the same fix I have on my other coop. It cost a few dollars and ten minutes, and it turned the flapping door into something I actually trust at night.
The run wire is also stapled to the frame on the inside, so check the staples seasonally, because a corner staple will work loose and nobody notices until something small has explored the coop. I do a slow walk around every coop at the change of each season, pressing on the wire and giving every staple a tug. That ten-minute habit caught a loose corner on the Aivituvin before it ever became a problem.
What the Daily Life Actually Feels Like
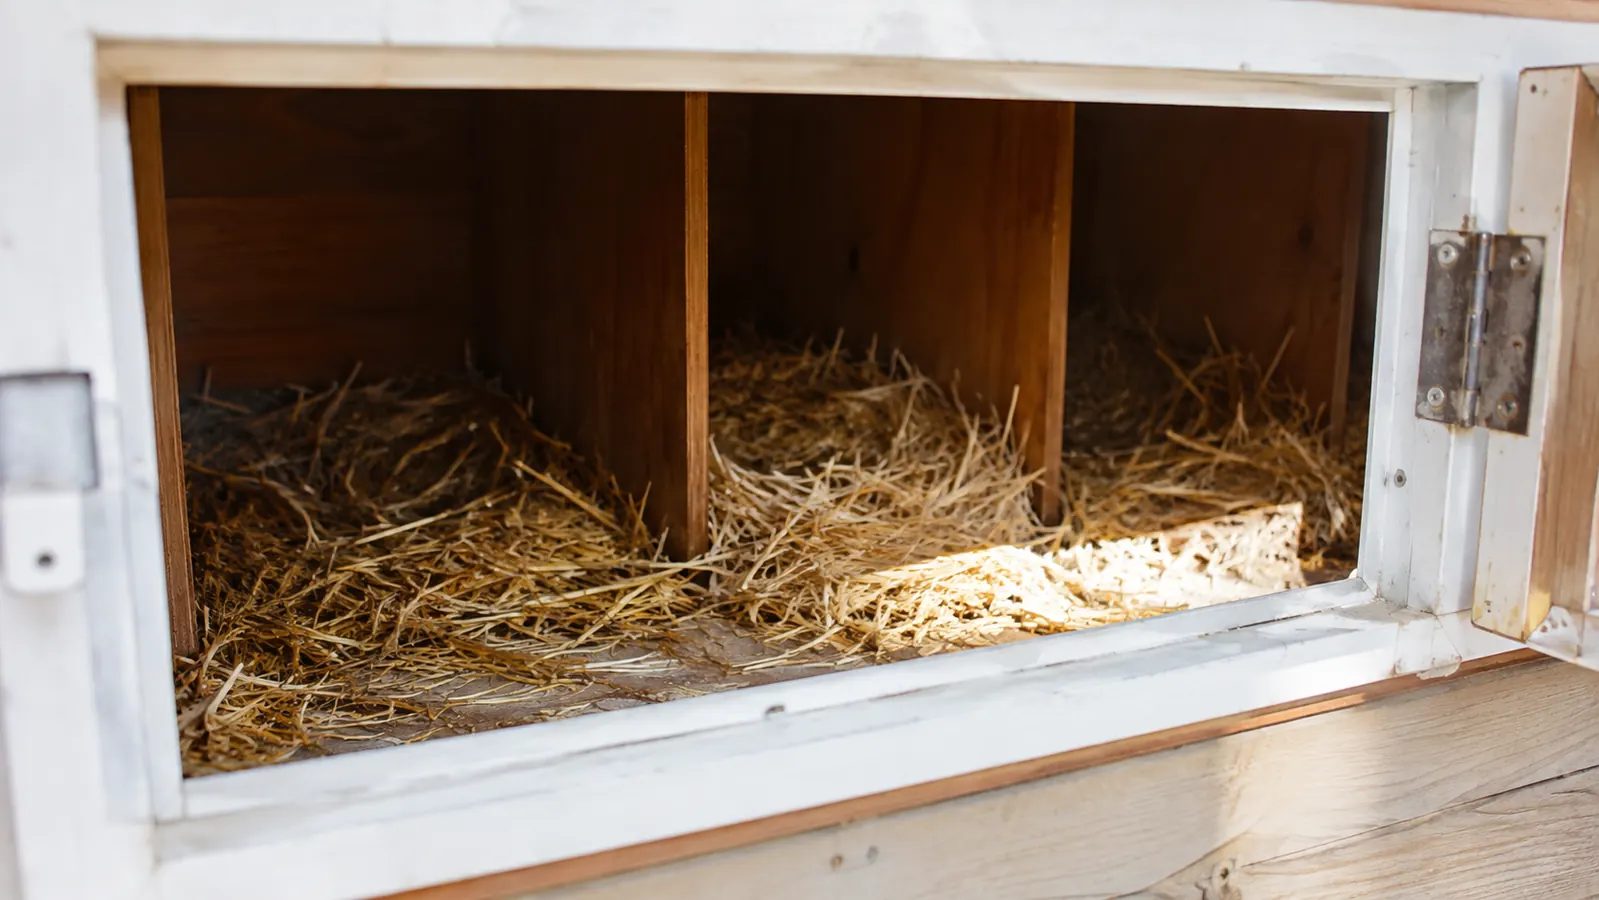
The best day-in, day-out feature is the nesting boxes. Two boxes sit on the outside wall with flip-up lids on the exterior, so I gather eggs without ever stepping inside or kneeling in the dirt. That little detail is worth more than the reviews ever say, because it is the kind of thing you only appreciate on a cold, muddy morning when the last thing you want is to crawl into a low coop. I open one latch, reach in, and the day's eggs are right there.
Cleaning is the other surprise, and it is a good one. The tray that catches the droppings slides out from the front, so most of the weekly work is pulling that tray, scraping it, and pushing it back. On deep-clean days I open the roof or the door and reach in to refresh the shavings, but the daily load stays in the tray. If you have ever owned a coop where you had to kneel and lean into a dark cave to scrape out a floor, you will appreciate this more than I can put into words.
What It Is Not
It is not a big coop. The listing says 4 to 6 birds, and I would hold it to the low end of that. Four of my Reds are comfortable in it. If you pushed six full-size hens in there, I think you would get feather picking, soggy shavings, and a lot of unhappy birds. Count your flock honestly and don't let the box talk you into overcrowding, because overstocking is how you end up with ammonia smell, pecking problems, and hens that stop laying from stress.
It is also not a free-range, walk-in space. You are cleaning it by opening the door and the roof, and you are not standing inside it. For my setup that is fine, and I suspect it is fine for most backyard keepers, because very few of us actually need to stand upright in a coop. But if your fantasy is a walk-in space big enough to work in while standing, this is not the one.
And it is wood. Which I say as a compliment, because a real wooden coop handles heat and cold far better than tin, and it looks like it belongs on a farm and not in a catalog. But wood is also work. It wants the seams checked, the feet kept off wet ground, and an occasional coat of exterior seal on the roof joints. My other coop is the same way, so none of that surprised me.
What I Liked
- Real plywood construction that handles weather far better than tin or plastic
- Two exterior nesting boxes that are a genuine pleasure to collect from
- Sliding tray under the roost makes the worst chore in chicken keeping fast
- Beveled panels that go together square, a real step up from cheap kits
- At 4 hens it is comfortable, dry, and low enough fuss to keep clean
Where It Falls Short
- Inside corners come under-reenforced and want brackets added before first use
- The roof panel is a two-person job and will crack if you wrestle it alone
- Run wire and the door latch are starter-grade and should be upgraded for real predator pressure
- Six hens is a squeeze; treat the capacity as four to five, not six
- Instructions are thin line drawings that reward reading fully before building
How the Aivituvin Holds Up Over Time
After a full season I can tell you the wood has kept its shape. The roof has not warped, the door still swings on the same plane it did the day I built it, and the exterior grey finish has held up to rain and sun without peeling. That used to be the surprise with a wooden coop at this size and weight. With the corner brackets on it, mine has honestly been boring in the best way: it just works, and I have stopped thinking about it.
The one wear point to keep an eye on is the screw holes that get opened and closed, mainly the ones on the door and the tray guide. If you ever feel a screw spin instead of holding, pull it and drop a wooden matchstick in the hole with a little wood glue before you drive it back in, and it will hold like new. That is a ten-minute fix that keeps a good coop going for years.
I also give the exterior a thin coat of a good outdoor wood seal once a year, focusing on the roof seams and the bottom edges where water sits. That is fifteen minutes once a year, and it is the difference between a coop that lasts and one that starts drinking moisture through its seams. The grey finish is already decently sealed from the factory, so this is insurance, not a full repaint.
Who This Is For
This coop is for the person who wants a real wooden home for a small flock, who has an afternoon and a little hardware to make it truly solid, and who is not put off by a bit of honest work with a screwdriver. If you want something that handles weather, keeps its shape, and looks the part on a small farm or a roomy backyard, and you plan to keep four or five hens, the Aivituvin is a strong choice. It is also a good first wood coop for someone who has outgrown a cheap plastic setup and is ready for the good stuff.
Who Should Skip It
Skip it if you want to unpack a box and have a full coop with zero straight-thinking. The Aivituvin asks for patience at assembly and a little reinforcement before you can trust it against a determined predator, and if that sounds like more involvement than you wanted, a cheaper or simpler setup would frustrate you less. Skip it if you keep more than five full-size hens, or if you want a walk-in coop you can stand up in. And if raccoons and weasels are a nightly threat where you live, plan the wire and latch upgrade into your budget, because the stock setup is a starting point, not a finished defense.
The way I think about it is simple: the Aivituvin is not the coop you buy because you want the least involvement. It is the coop you buy because you want a real wooden home for your hens and you are willing to spend one honest afternoon making it everything it should be. Done that way, it will carry a small flock quietly for years. That is a fair trade, and it is the honest version of the story the five-star reviews only get half right.
The same coop, ready for your flock
Assemble it, put the brackets in the corners, upgrade the latch, and you have a wooden home that will carry four hens through the seasons. That is a fair trade for one afternoon of work. See the current price.
Amazon Check Today's Price on Amazon →